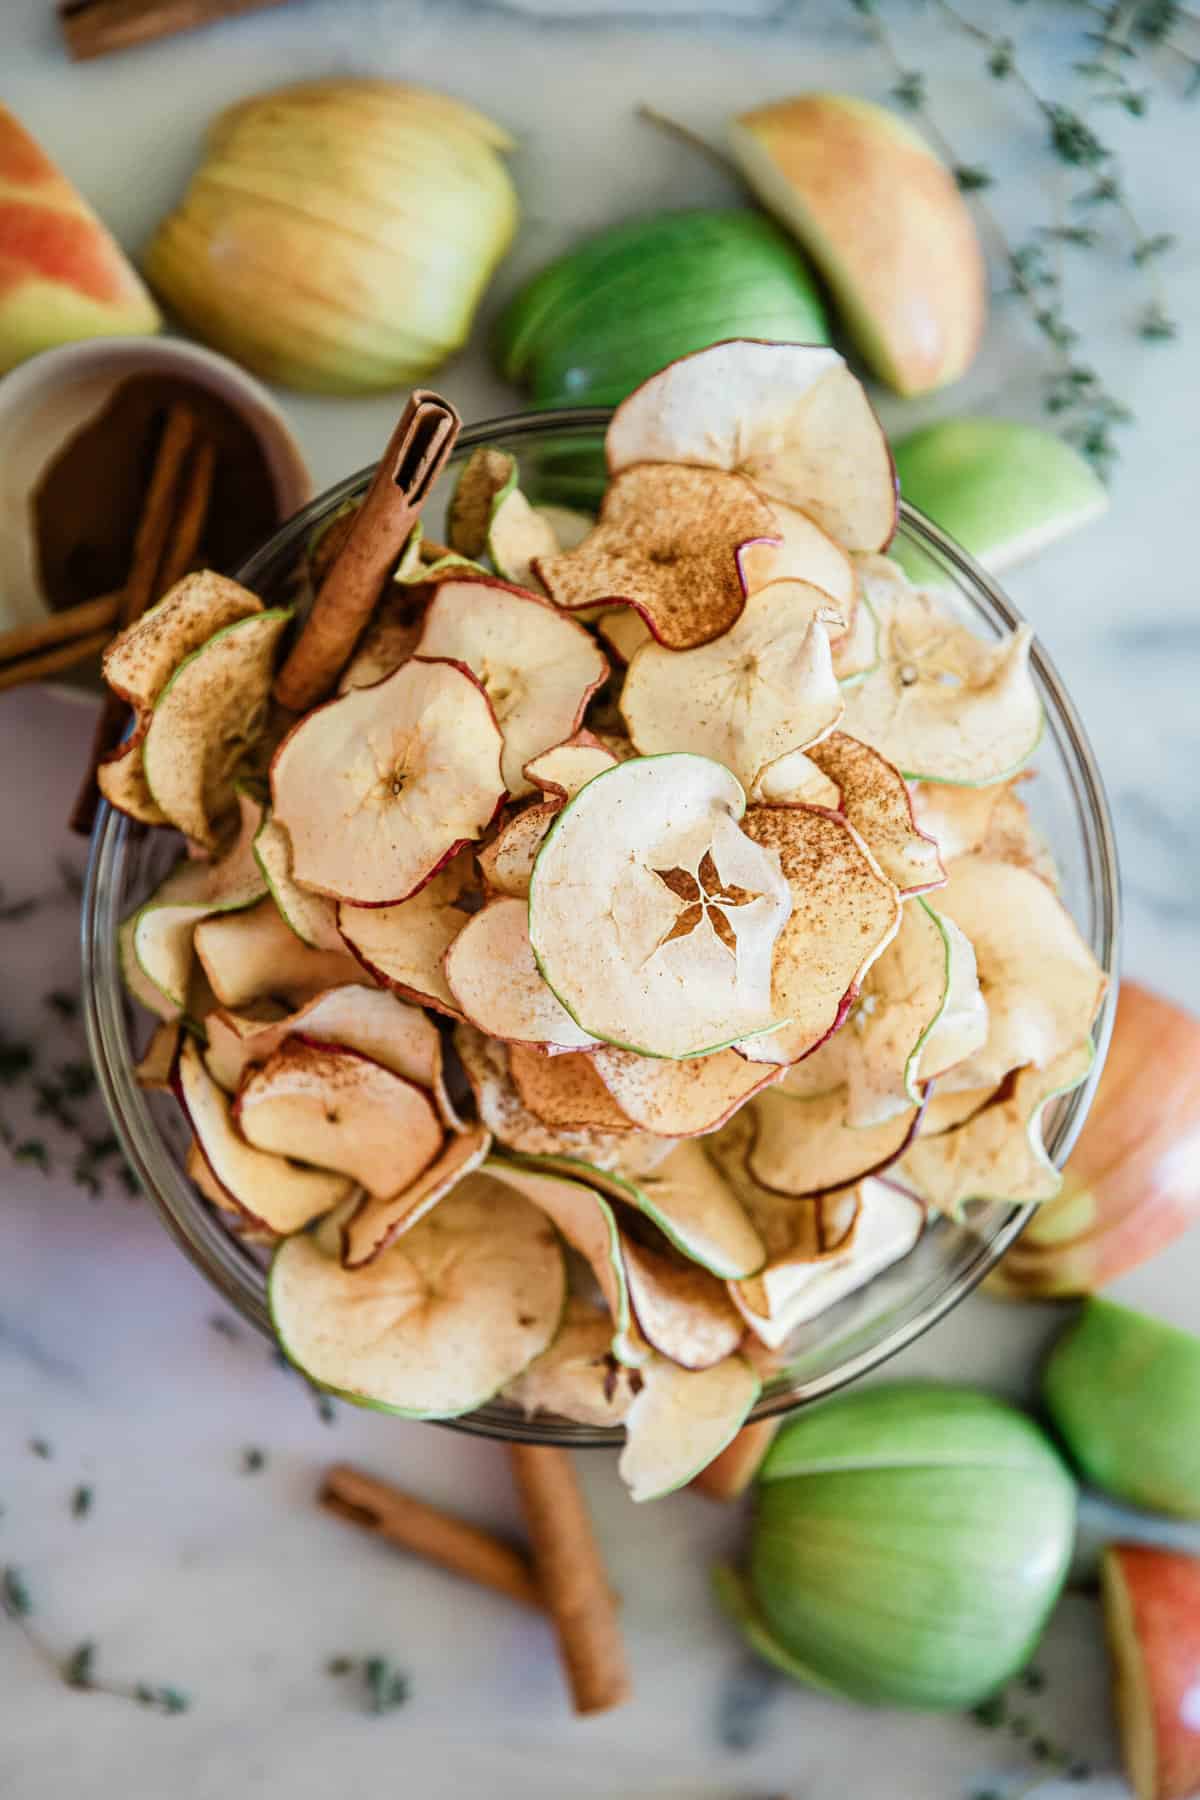
This apple chips recipe is delicious and easy, and also healthy! Made in a dehydrator, these cinnamon apple chips are the perfect crunchy snack for taking to the park, beach, or lounging on the couch.
Why You'll Love This Recipe
These homemade apple chips are about as basic as they get when it comes to dried foods. Dried apples are a classic. You're going to love these little delicious bites becuase:
- They are delicious and easy. Not to mention a healthy snack!
- I love packing a gallon sized ziplock of these guys when we are on the run. My kids love them, I love them.
- They satisfy that craving for crunch and they keep me out of the drive thru!
- There is zero added sugar.
About The Ingredients & Tools
The ingredient list for dehydrated apple chips is short, and everything can be purchased at your local grocery store. Here are a few items to note:
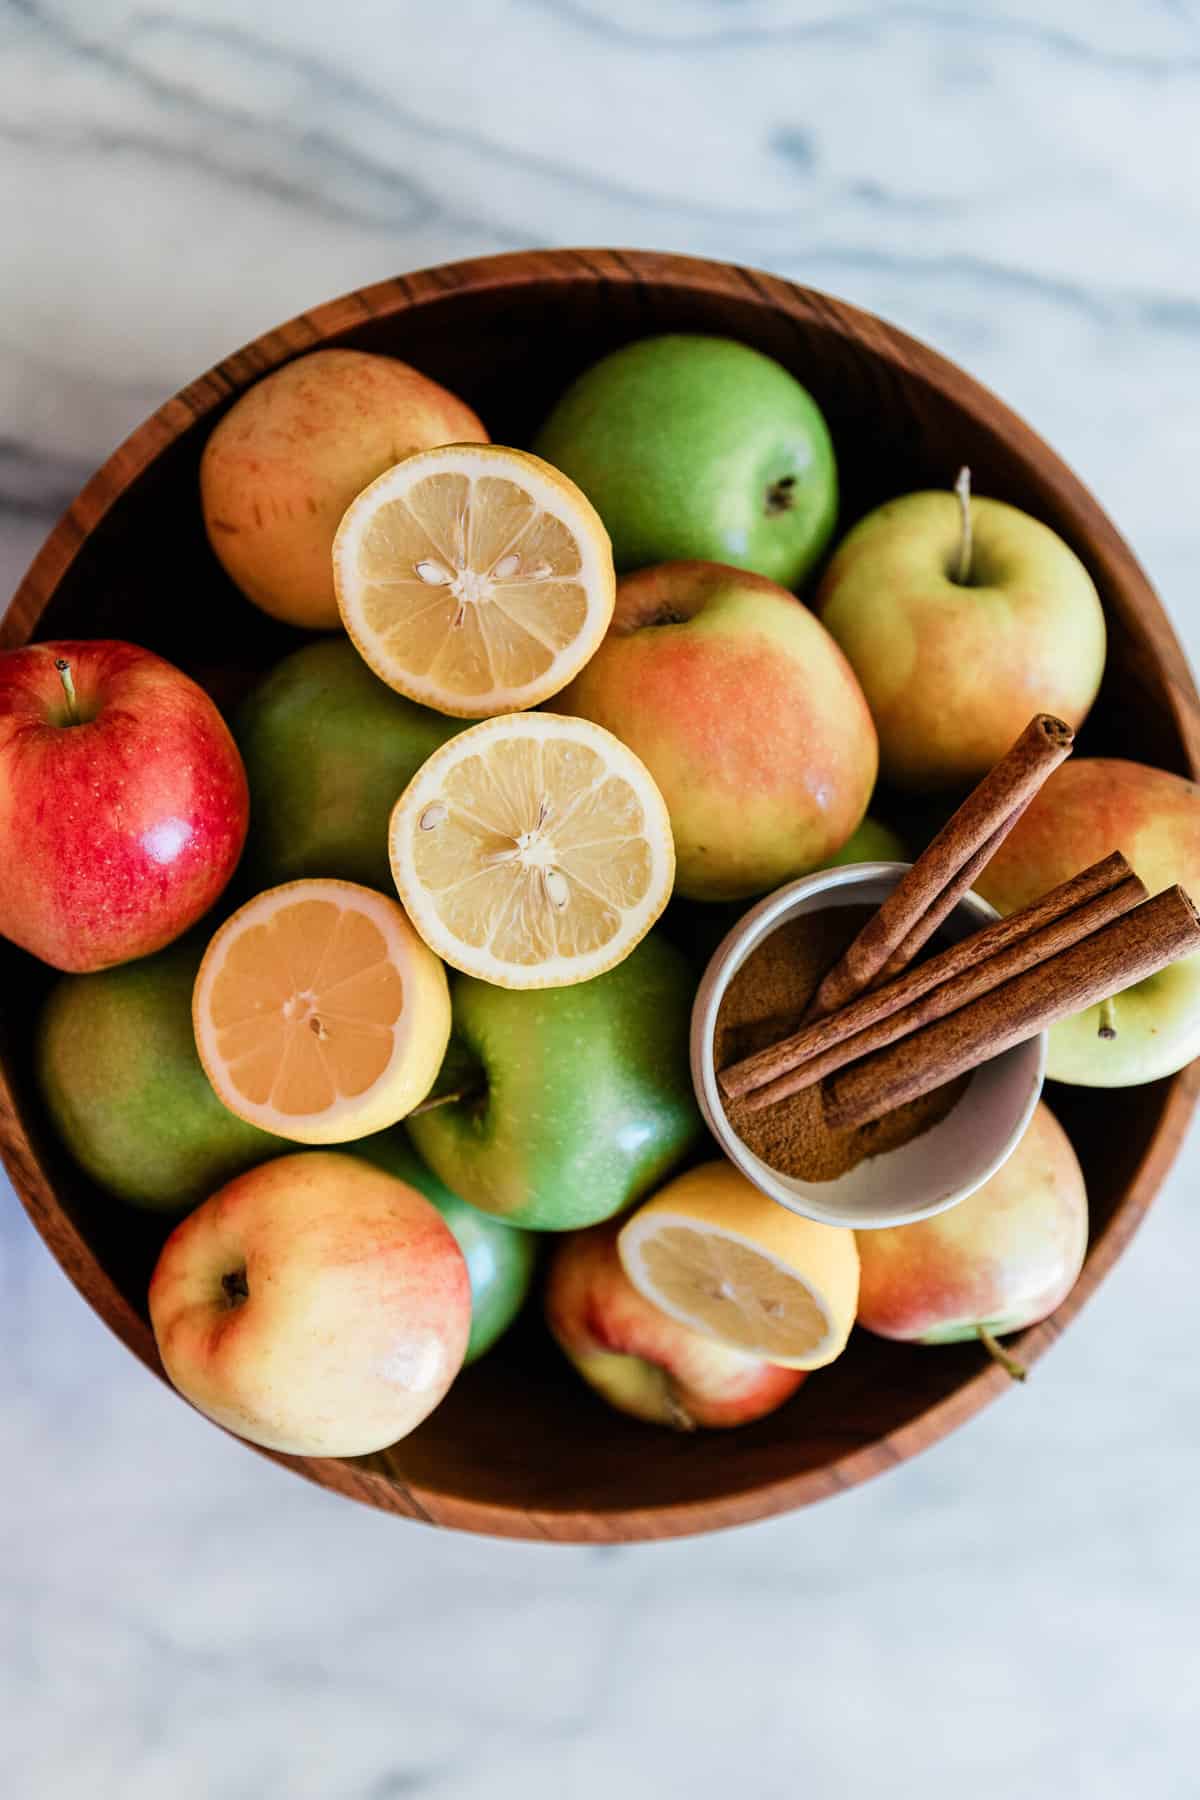
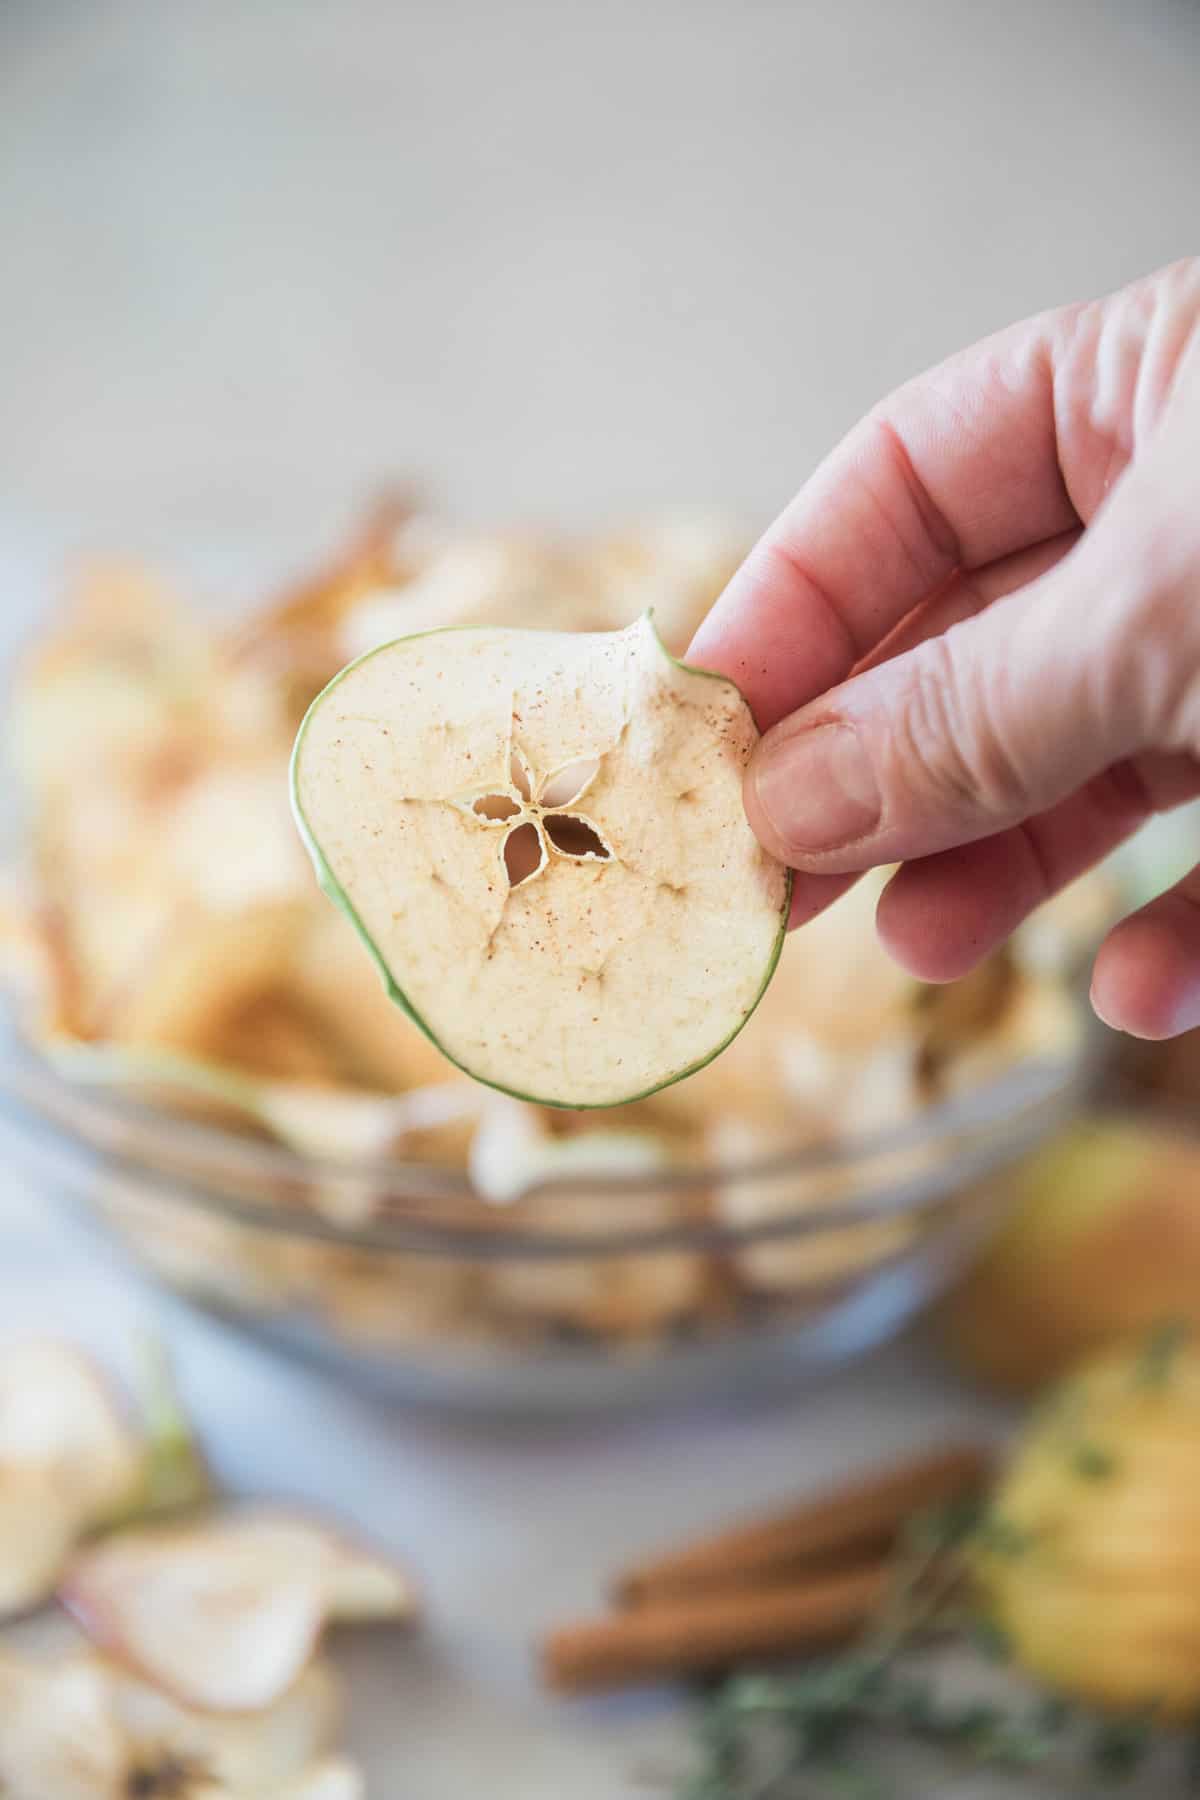
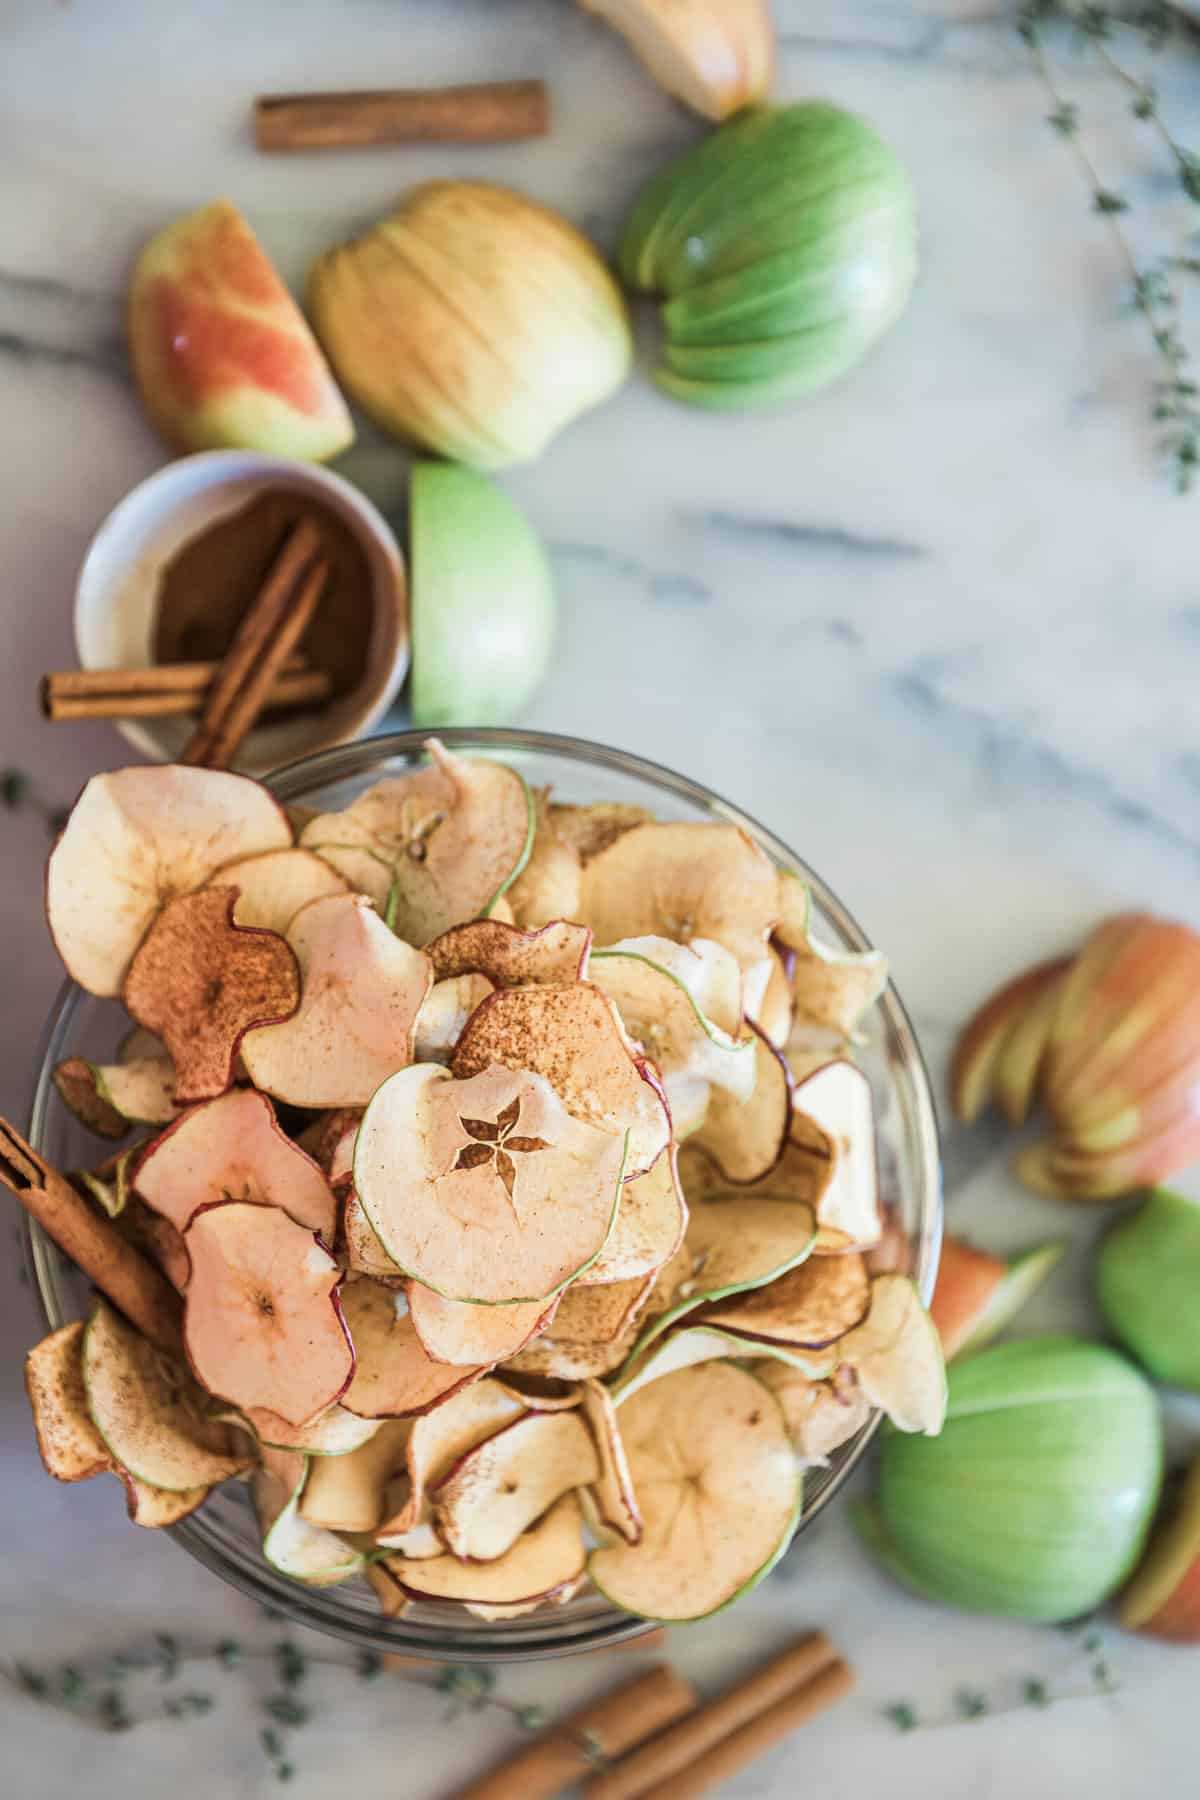
- Apples - choose the variety you enjoy. The Granny Smith will give you a really tart apple chip, while a sweeter variety like gala will give you a sweeter chip.
- Lemon juice - this just keeps the apples from browning. It is optional, but I like to add it.
- Cinnamon - adding ground cinnamon gives these apple chips some warmth and extra flavor.
- Food Dehydrator - I feel like using a dehydrator is the best way to make these apple chips. The results are consistent and require less babysitting than making in the oven.
- Mandolin - slicing your apples thin and uniform is key for even dehydration. So I like to use a mandolin to do this.
A complete list of ingredients and amounts can be located in the recipe card below.
How To Make Them
The steps for making apple chips are seriously so quick and easy. Let me show you how to make them.
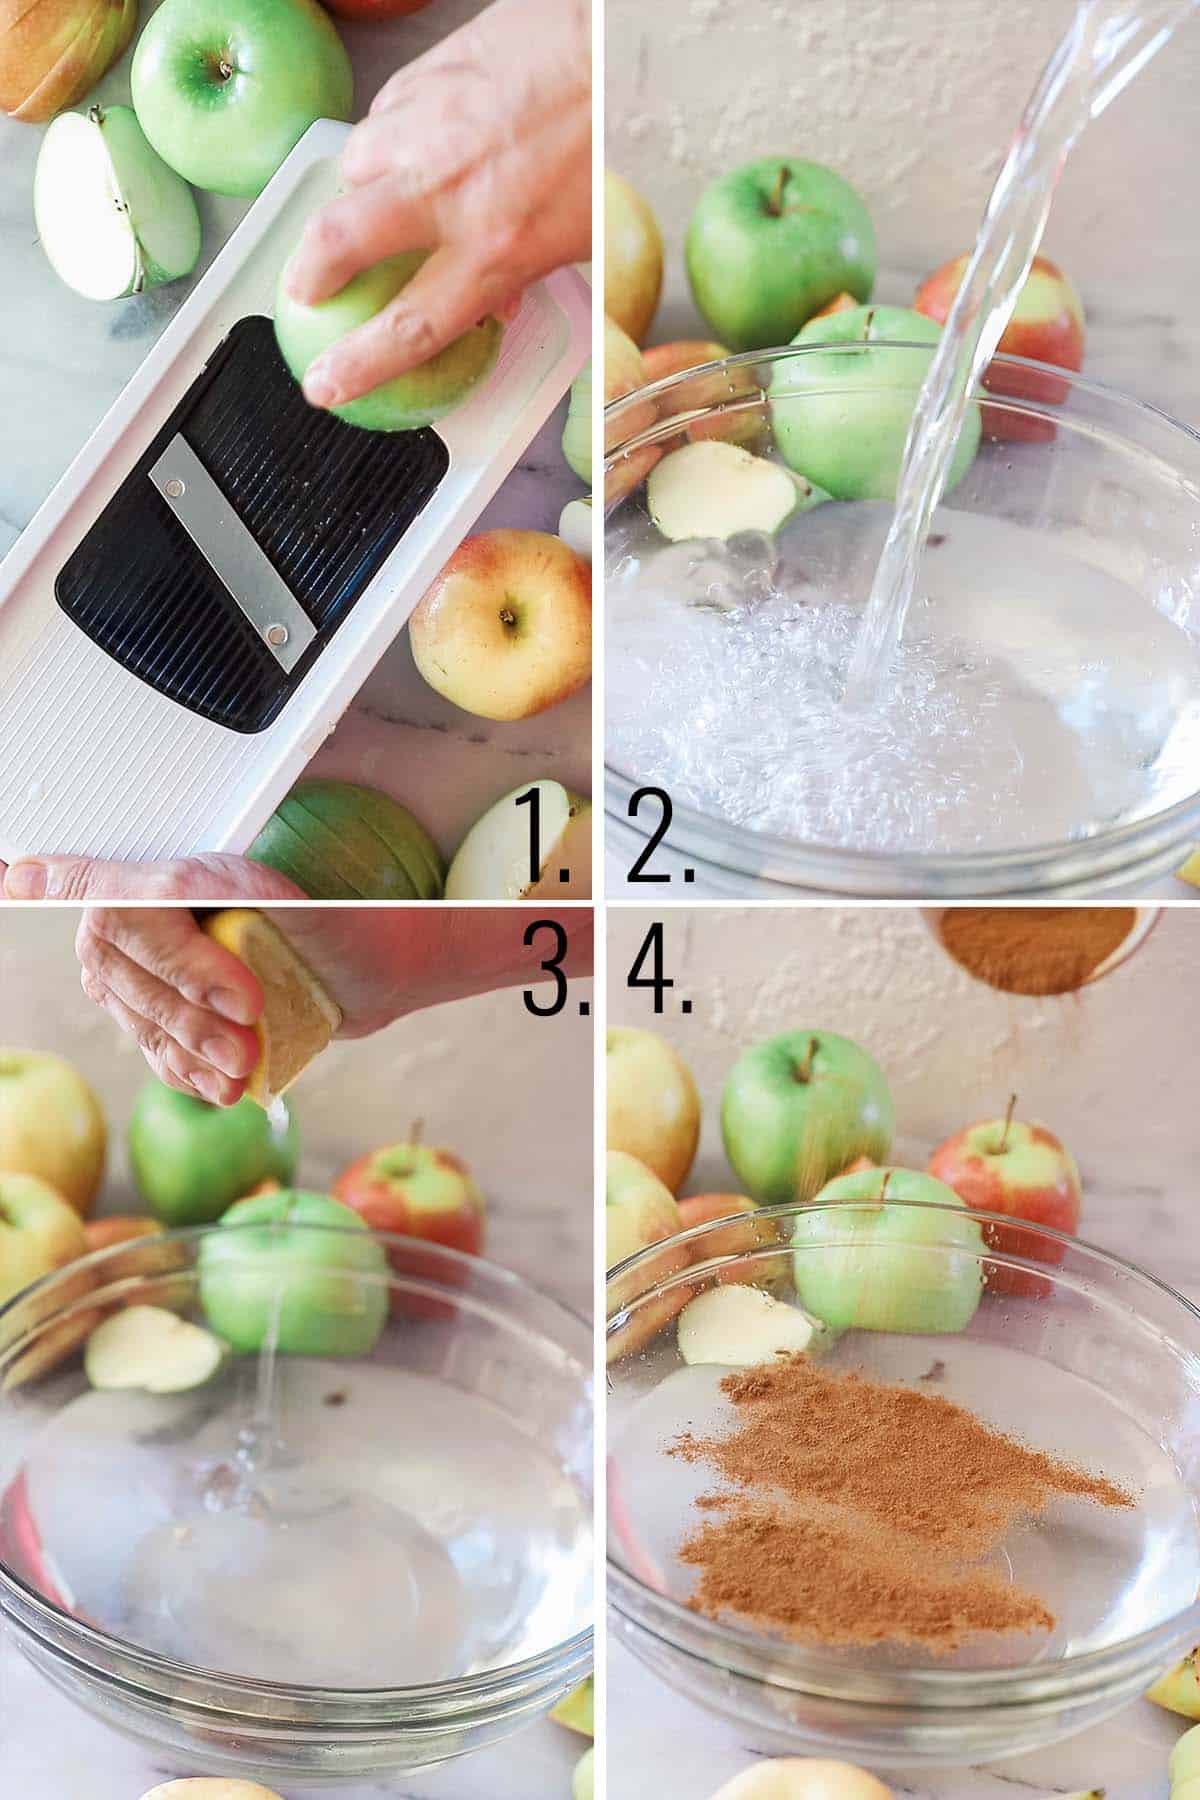
- Slice apples thin. I like to use a mandolin to do this, but you can also use a sharp knife and slice less than ¼ inch thick apple slices. I don't bother coring them.
- In a large bowl add water.
- Squeeze in some lemon juice.
- Add a sprinkle of cinnamon.
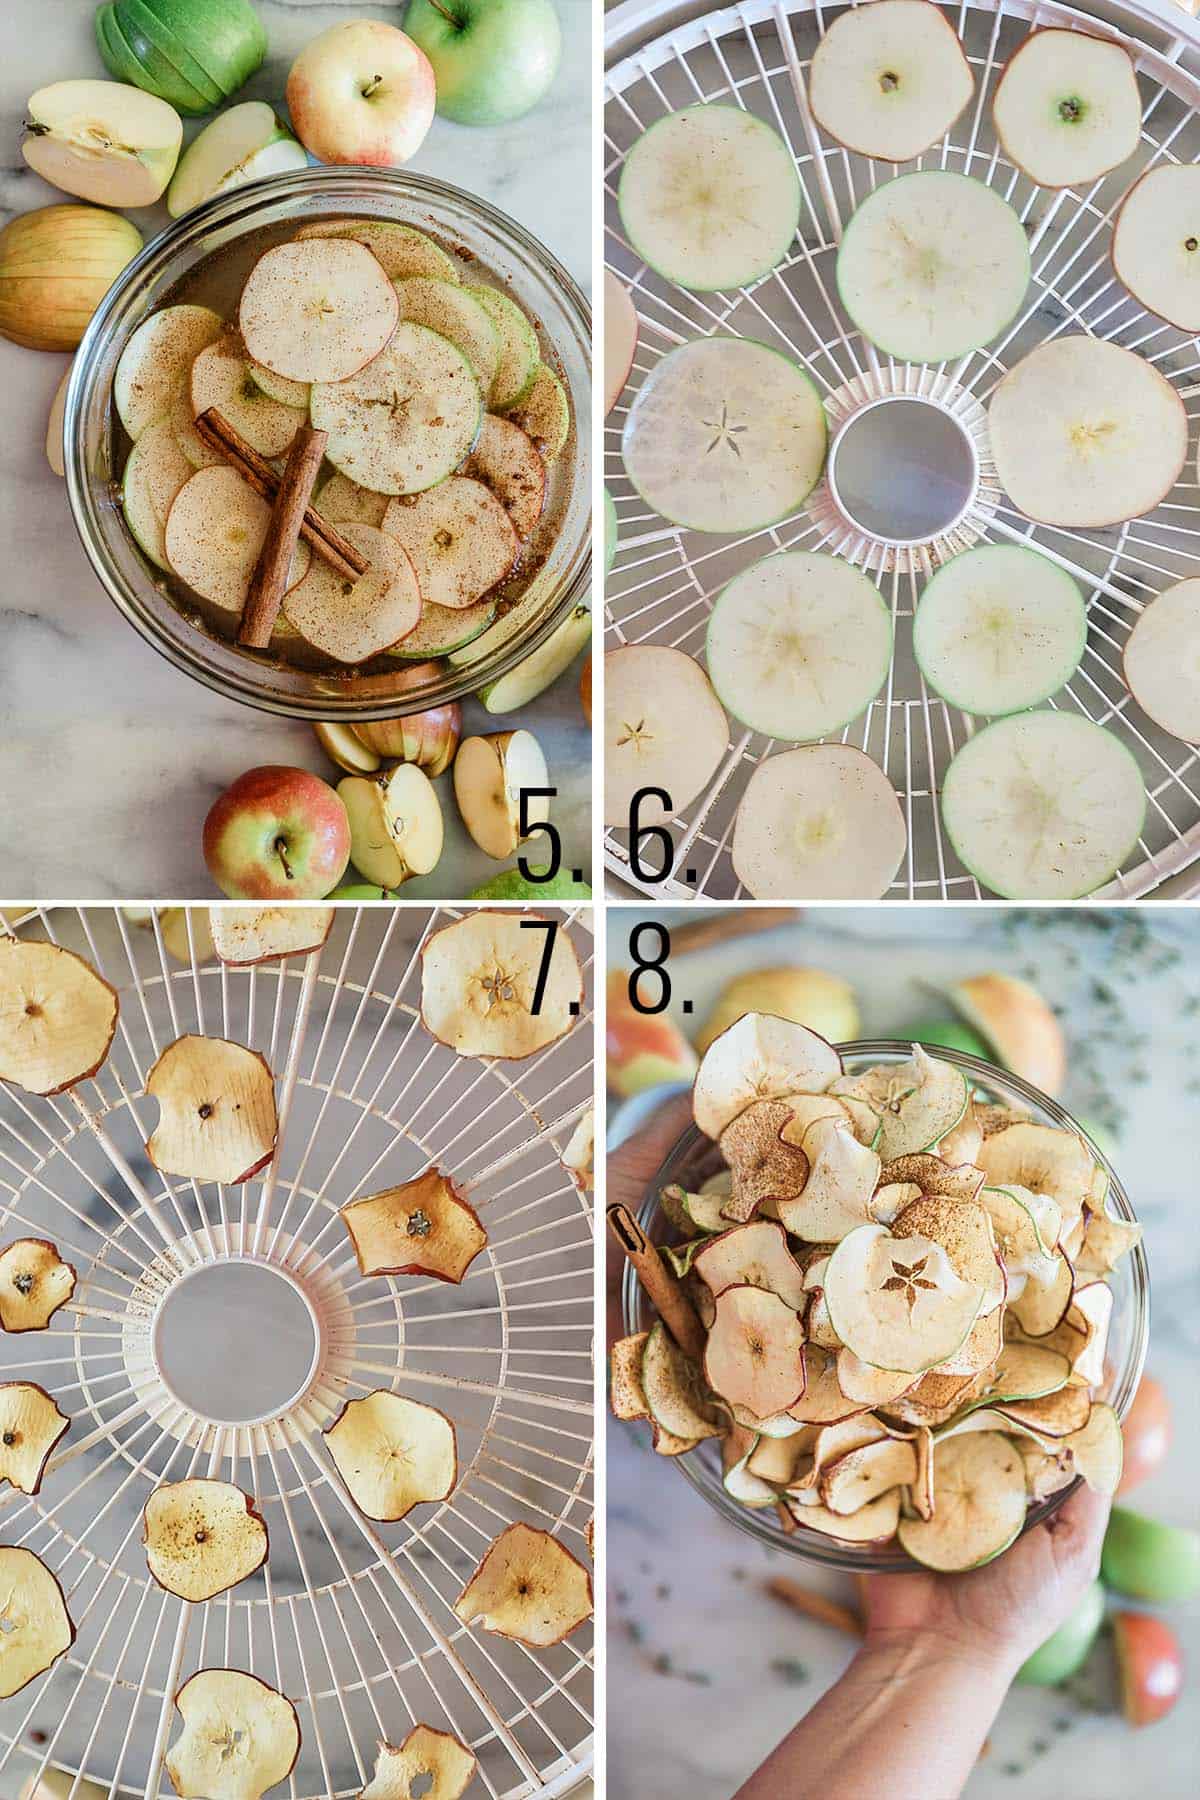
- Soak your apple chips in the mixture. Let sit for 2-3 minutes.
- Transfer slices to your dehydrator tray, laying them down in a single layer.
- Dehydrate for 4-6 hours. Check at 4.
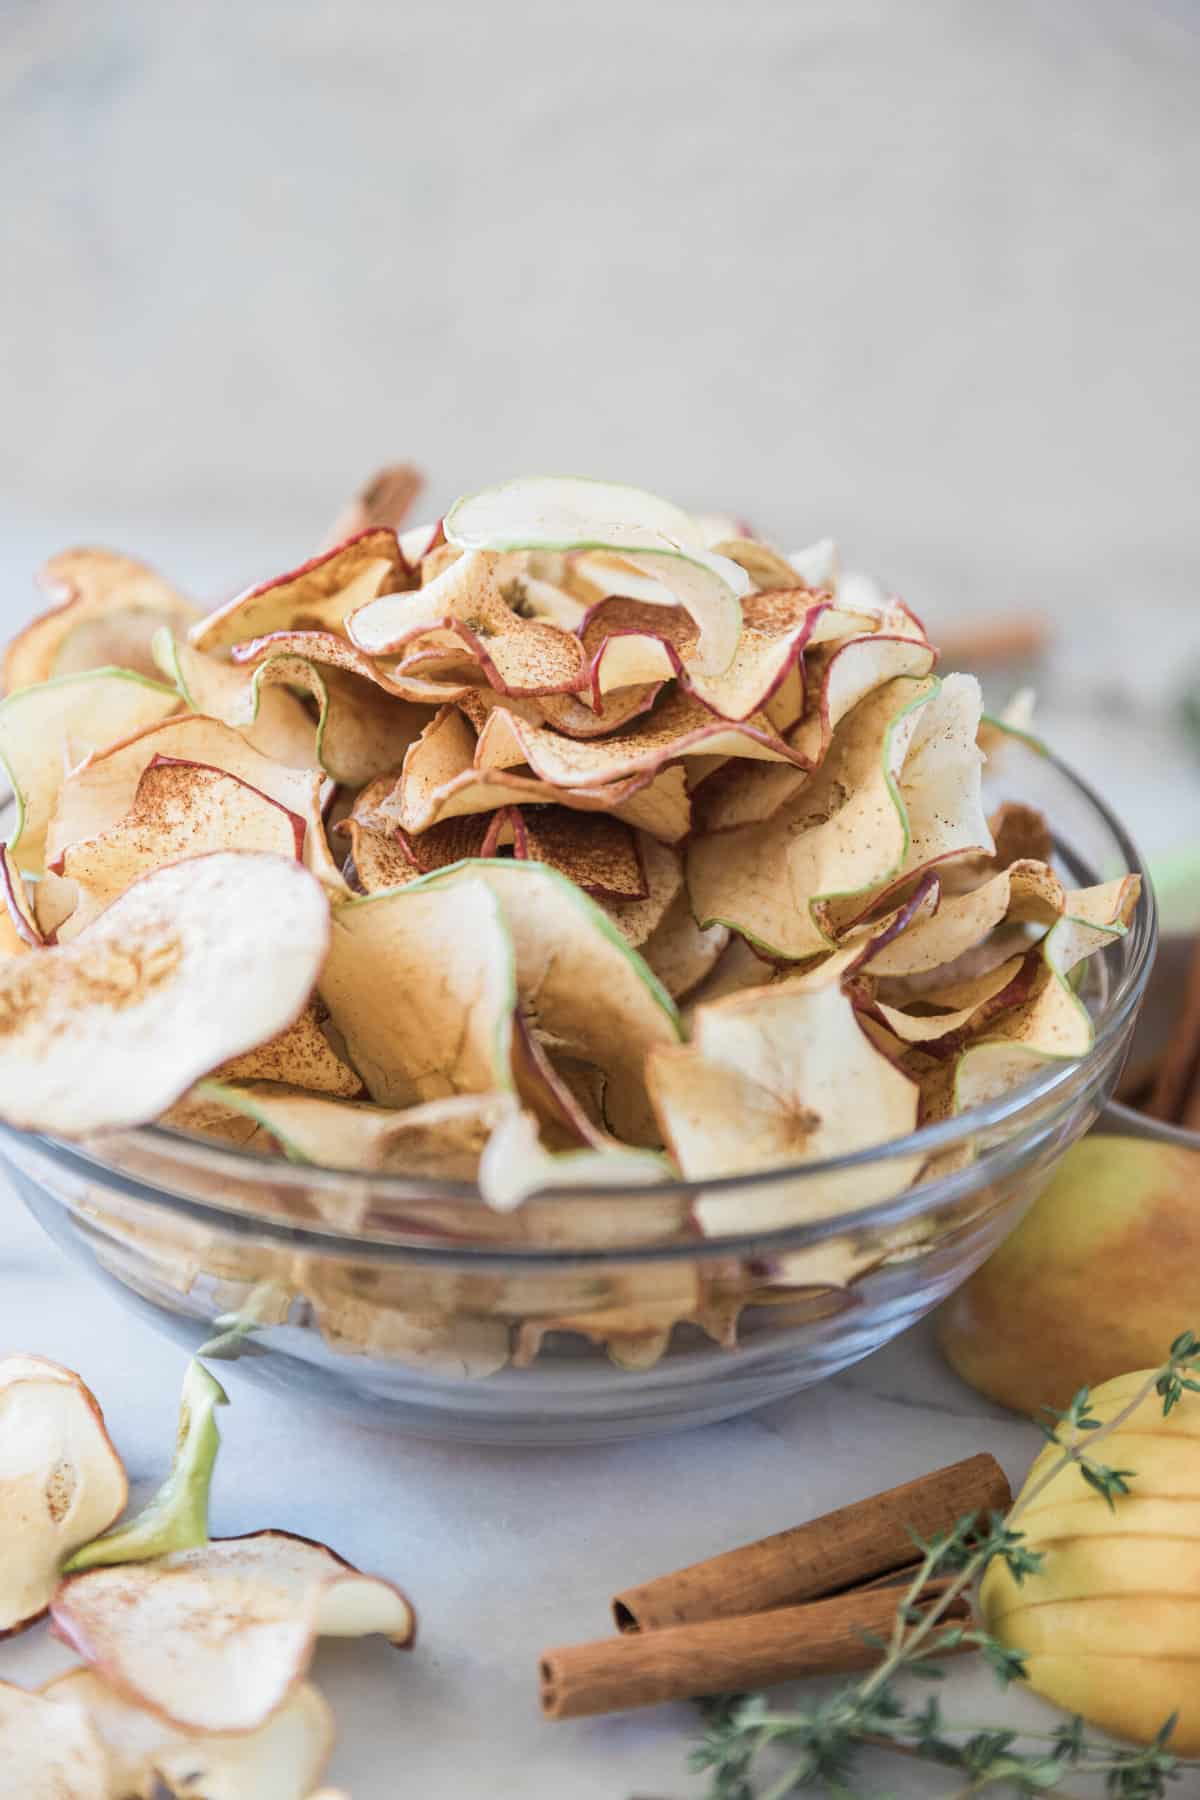
- Store dried apple chips in an airtight container.
Can I Make Them In The Oven?
We wanted to give you the basics of dehydrating before he get started. Many people think you need a dehydrator to dry foods. That is not the case. All dehydrated snacks can be done in your oven. If you do have a dehydrator - great! It's such a fun appliance to own. There is a wide range of prices and quality when it comes to dehydrators. I use a Nesco dehydrator that my mother in law gave us for Christmas a few years back. When shopping for a dehydrator choose a size and price point that's right for you. We'd love to hear what kind of dehydrator you use!
Here is how to make baked apple chips in the oven:
- Preheat oven to the lowest temperature available - usually around 200 degrees, but the lower the better.
- Place your fresh food on non stick oven safe baking sheets. I recommend using a silicone mat like a Silpat to ensure nothing gets stuck to your pan during the process. You could also use parchment paper.
- Prop your oven door open with a wooden spoon to increase airflow and decrease condensation. Drying foods in the oven may take a bit less time than in a dehydrator so keep an eye on it.
Can I Make Them in The Air Fryer?
This is a newer method to dehydration. It results in more of a crispy, cooked apple chip rather than a truly dehydrated apple. But if you want to go that route, here is how you'll make air fryer apple chips:
- Place apple slices in your air fryer basket in a single layer.
- Cook at a 300 degrees for 12-15 minutes, flipping them 3 times during the cooking.
Pro Kitchen Tips
- Choose quality produce. The better your food tastes before you dry it, the better it will taste after it's dried. If you have a sour peach, its still gonna be sour after you dry it.
- What do you need? Some tools that are handy when it comes to drying foods include a blender, a spatula, and a good sharp knife or mandolin.
- Store your dried foods in airtight containers. Dried foods will last a very long time - but moisture in the air is the enemy. So make sure they a stored in a tight container.
- Experiment! The water content of your food will largely determine how long it takes to dry your foods. So there is no hard and fast rule for how long you'll have to dehydrate a certain food. The easiest way to test them is to touch it. If it still feels moist - let it go a bit longer.
- Drying foods does not effect their nutritional of caloric value. A minimal amount of nutrients are lost when doing home dehydrating as opposed to store bough dehydrated foods. Also - a dried apple still has the same amount of calories as a fresh apple.
- Drying summer produce is a great way to preserve summer flavors into the cooler months!
FAQ
No, just store in an airtight container at room temperature.
These will last about a week. Store dried apples in an airtight container.
My personal opinion is no. But it is up to you. Feel free to core them if you want to, but just know that once they are dried you won't even notice the core. Coring them makes more of an apple ring.
More Apple Recipes
If you like dehydrated apples, you'll also love these other apple recipes:

Keep In Touch!
If you tried this Apple Chips Recipe recipe or any other holiday recipes on the blog then don’t forget to rate the recipe and leave us a comment below. You can also follow us on Facebook, Twitter, Instagram and Pinterest to see what else we’re getting up to!

Apple Chips Recipe
Equipment
Ingredients
- 4 apples - variety of your choice
- 1 cup water
- juice from one lemon
- 1 teaspoon cinnamon
Instructions
- Slice apples thin - between ⅛ inch and ¼ inch. I like to use a mandolin.
- In a large bowl combine water, lime juice, cinnamon, and sugar. Place apple slices in mixture and soak 2-3 minutes.
- Transfer apples slices to dehydrator trays, or a baking sheet linen with a silicone liner.
- If using a dehydrator set to medium heat and dry until crisp - usually 4-6 hours. Check at 4 hours.
- If using an oven, turn to lowest temp - around 200 degrees. Prop oven door open with a wooden spoon to allow better air flow and bake for 3-6 hours. Check at 3 hours.
- Store in an airtight container.


Vickie Ayler says
I can’t wait to try this !!!! We make dehydrated sweet potatoes snacks for our dogs and dehydrated beef jerky , the possibilities are endless !
Aleshia says
Why the water? Wouldn’t that just rinse off the cinnamon?
Kadee says
Its just a quick soak in lemon juice/cinnamon/water. It is more for the lemon juice - it keeps them from turning brown. If you prefer more cinnamon you can sprinkle it on before dehydrating.
Erin V says
good to know the ins and outs of dehydrating–still so new to it!